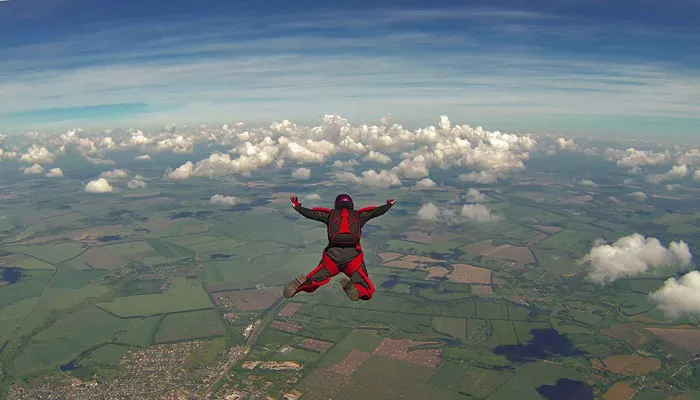
Solo skydiving is a thrilling adventure that offers the freedom to jump from a plane on your own. It is a sport that combines skill, mental preparation, and physical control. Unlike tandem skydiving, where an instructor is harnessed to you, solo skydiving means you are fully responsible for deploying your parachute and navigating your descent. This article will guide beginners through the necessary equipment, core techniques, safety measures, and a structured plan to start this exhilarating journey.
Essential Equipment for Solo Skydiving
Main Parachute
The main parachute is your primary canopy used to slow your descent after freefall. It is packed in the main container of your rig and should be maintained regularly to ensure reliability.
Reserve Parachute
This is a backup parachute that you use only if the main canopy fails. Federal Aviation Administration (FAA) regulations require it to be repacked every 180 days by a certified rigger.
Automatic Activation Device (AAD)
An AAD is a small device that automatically deploys your reserve parachute if you reach a certain altitude at freefall speed. This is a vital safety component for all solo skydivers, especially beginners.
Altimeter
An altimeter is used to monitor your altitude during the jump. It may be analog or digital and is worn on your wrist or chest. Accurate altitude awareness is crucial for timely parachute deployment.
Helmet and Goggles
A helmet protects your head during exit, freefall, and landing. Goggles protect your eyes from wind and debris. Both are mandatory for every skydive.
Jumpsuit and Footwear
A jumpsuit reduces wind resistance and helps stabilize your body position during freefall. Sturdy athletic shoes with good ankle support are recommended.
Training and Certification for Solo Jumps
Accelerated Freefall (AFF) Course
The AFF program is the most common training method for solo skydiving. It includes ground school and at least seven levels of jumps with instructors. You learn body position, parachute deployment, altitude awareness, and emergency procedures.
USPA A-License Requirements
To jump solo without instructor supervision, you must earn the United States Parachute Association (USPA) A-License. Requirements include:
- 25 completed jumps
- Successful completion of AFF or other approved program
- Passing a written and practical test
Basic Solo Skydiving Techniques
Body Position in Freefall
Maintain a stable arch position: hips forward, arms and legs spread, chin up. This position prevents tumbling and allows better control.
Altitude Awareness
Always monitor your altimeter. Know your deployment altitude and be prepared to pull the ripcord at the correct height. A common deployment altitude is 3,500 to 4,000 feet above ground level.
Parachute Deployment
At the correct altitude, reach back with your right hand to find the pilot chute handle. Pull it firmly to deploy your main canopy. Count to five and check if the parachute has deployed properly.
Canopy Control
Once under a fully inflated canopy, use the steering toggles to guide your descent. Learn to recognize wind direction and avoid obstacles.
Landing Technique
Perform a flare (pulling both toggles down) at 10 to 15 feet above ground to slow down your descent before landing. Bend your knees slightly to absorb impact.
Step-by-Step Guide for Beginners
Step 1: Choose a USPA-Certified Drop Zone
Select a reputable skydiving center certified by the USPA. Certification ensures high safety standards and professional instruction.
Step 2: Enroll in Ground School
The ground course covers basic flight principles, gear operation, emergency procedures, and body positioning. It typically lasts 4–8 hours.
Step 3: Complete Your First AFF Jump
Your first solo jump will be under instructor supervision. They may hold onto you during exit and freefall but won’t be harnessed to you.
Step 4: Progress Through AFF Levels
Each level introduces new skills and scenarios. You must demonstrate stability, awareness, and control before advancing.
Step 5: Log 25 Jumps and Get Licensed
After completing the required jumps and passing the test, apply for your USPA A-License to jump independently anywhere in the world.
Safety Tips for Solo Skydivers
Check Your Gear Before Every Jump
Inspect your rig, altimeter, helmet, and goggles before boarding the plane. Ensure the reserve is packed and the AAD is functioning.
Stay Current with Your Jumps
Practice regularly to maintain your skills. If you take a break, consider refresher training before jumping again.
Listen to Weather Briefings
Only jump in safe weather conditions. Avoid high winds, rain, or poor visibility. Trust your instructor’s judgment if conditions are questionable.
Know Emergency Procedures
Practice reserve deployment, cutaway, and handle recognition. In an emergency, acting quickly and calmly is essential.
Jump with a Plan
Always have a flight plan for your jump. Know your exit point, deployment altitude, and landing area. Communicate with instructors and follow all protocols.
Common Challenges Faced by Beginners
Fear and Anxiety
It’s natural to feel nervous before a jump. Practice deep breathing, visualize your jump, and focus on training. Confidence builds with experience.
Improper Body Position
Inconsistent arching or flailing arms can destabilize your freefall. Regular practice and instructor feedback help improve form.
Altitude Misjudgment
Failure to check your altimeter frequently can lead to late deployments. Build a habit of checking every few seconds during freefall.
Hard Landings
Incorrect flare timing or poor canopy control can cause hard landings. Learn wind patterns and perform controlled flares.
Conclusion
Solo skydiving is one of the most liberating experiences you can undertake. With the right training, proper equipment, and attention to safety, anyone can enjoy this high-adrenaline sport. Take your time to progress through each stage and always prioritize safety. The sky isn’t the limit — it’s your playground.

